
This guide will show you how to create a GUI for a simple plugin that logs some text to RPG Developer Bakin's debug logs.
As such we will only go into the basics of creating a GUI as there are already plenty of useful guides available for this such as Microsoft's tutorials.
Prerequisites
Before you start making your GUI, you will need to install Visual Studio. You can download it here - https://visualstudio.microsoft.com/downloads/
It also helps (but isn't required) to have a basic understanding of C#
Resources
You can download a zip file containing the scripts used in this guide to use as a reference.
Create Your Project
Start off by creating a new Windows Forms project in Visual Studio. Follow the steps on this guide to do so - https://learn.microsoft.com/en-us/visualstudio/ide/create-csharp-winform-visual-studio
Note: Your project name must have the word "plugin" in its name (e.g. "DemoWindowsFormsPlugin")
Design the User Interface
Once your project is setup, design the user interface however you see fit.
The purpose of this GUI is to allow you to enter some text which will be shown in the Bakin debug logs.
With this in mind, we will create a textbox to type into, a label for the textbox and a button to save our changes.
Creating a Textbox
To create a textbox, open the Toolbox from the side-bar (on the left). Then, find and select "Textbox". From there, click and drag over your design window to draw your textbox.
Creating a Label
Next, find and select "Label" from the Toolbox. Then, click into design window to place it (feel free to move it wherever you'd like). Now we have a textbox and a label, let's configure them.
Creating a Button
Finally, find and select "Button" from the Toolbox. Then click and drag over your design window to draw your button.

Configuring Properties
Check that you can see the "Properties" window in the bottom right corner. If not, select "View" from the top menu and then select "Properties Window".
We'll start off by configuring the Label properties:
Text: "Text to display"
AutoSize: True - This determines if label's size should automatically increase if the text size becomes too large.
Font > Size: 14
Font > Bold: True
Next, let's configure the Textbox properties:
BorderStyle: None - This determines whether there is a border around the textbox
Font > Size: 13
Text: "Default text to show"
(Name): "textToShow" - This is the name the textbox is referred to in the code. More on this later.
Finally, let's configure the Button properties:
(Name): "saveButton"
BackColor: Your choice - This is the background colour of the button
Cursor: Hand - This determines which type of cursor to display while hovering over the button
Font > Size: 12
ForeColor: Your choice - This is the text colour
Text: "Save"
After setting these properties, the elements will look a little nicer compared to their defaults.

Setting Project Properties
We now need to make sure our project's properties are set correctly so that we can build our project when we're ready.
First, double-click on "Properties" in the Solution Explorer.

From there, select the "Output type" drop-down menu and select "Class Library".

Next, on the left, select "Build" and make sure you're happy with the output path. This is where the project will be built when we're finished.

Next, select "Resources" from the left and add a new row with the name of "PluginName" and a value of whatever you want to name the GUI.

Still in the Resources section, click the button that says "Strings" and select "Images".

From there, select down-arrow to the right of "Add Resource" and select "Add existing file". Then, select the file that you'd like to use. This image will be the icon displayed in Bakin's Functions menu.
Note: The size of the image should be 32x32 pixels
Start Creating the Back-End
Note: This is likely the hardest part of the guide so I will try my best to explain however, if people still have questions, please feel free to contact me for support
Add the missing Bakin libraries
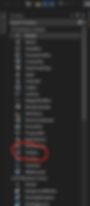
In the Solution Explorer (upper-right), expand "References" and confirm that you don't currently have either "common" or "yukarengine".

Right-click "References" and select "Add Reference...". This will open the Reference Manager.
Select "Browse..." at the bottom-right. Then, go to "steamapps/common/BAKIN/lib" and select "common.dll" and press "Add".
Repeat the above but this time, select "yukarengine.dll" and press "Add".
This will add the references to the Reference Manager. If the options aren't already ticked, tick both common.dll and yukarengine.dll and press "OK".

Create the Plugin Definition
To begin, create a new class file by right-clicking on the project name in the Solution Explorer, hovering over "Add" and selecting "Class".

Next update the file so it looks similar to the below. I will explain the important lines of code beneath the image.

Line 13 - This gets the "PluginName" that you set in the Resources previously so that it shows the correct plugin name in Bakin's Functions menu.
Line 28 - This gets the icon you created in the Resources section previously so that the correct icon can be displayed in Bakin's Functions menu.
Create the Form Script
Note: The complete script file shown below will be provided so you can use it as a reference if needs be
Double click the Save button in your design window. This should open up a script file and take you to something that looks similar to the below.

Create Chunk Class
Create a chunk class (shown below). Important lines will be explained beneath the image.

Line 17 - Defines a class called "Chunk". This is what will store our text from the design window.
Line 19 - Defines a class property called TextToShow. It currently has no value at the moment.
Creating the Constructor

Line 18 - This sets Guid which is simply an ID. It is the ID of an "ExtraChunk". An ExtraChunk is the data we will be storing in RPG Developer Bakin. We're assigning it an ID so that once we've saved it in our form, we can then access it again in our plugin script.
Line 19 - This is a class provided by RPG Developer Bakin that, among other things, allows us to get and store items (such as ExtraChunks) in the Bakin engine.
Line 20 - This is our variable to store an instance of our "Chunk" class that we created previously.
Line 42 - This is the code that is run first when someone opens our GUI in Bakin.
Lines 50 - 57 - This checks if Bakin currently has any chunk data that we may have stored previously and, if it does, sets the "Text" property of our textbox to the value of that data. For example, if someone uses the GUI and types "Hello" into the textbox and saves it, the next time they open the GUI, the textbox will still say "Hello" instead of reverting back to "Default text to show".
Define What Happens When You Press Save
When you first opened this script file, you should have seen that there was a method with the name of "saveButton_Click" already there. This is the code that gets run when we press the "Save" button in our form.

Line 64 - This sets the value of the Chunk's TextToShow property to whatever is currently typed into our textbox
Lines 66 - 76 - This checks if there are any ExtraChunks in Bakin with the _extraChunkId we set previously
If there aren't, we run the code on lines 70 and 71 which creates a new ExtraChunk with the _extraChunkId and adds that to Bakin's catalog of items.
If there is an ExtraChunk that already exists (i.e. if someone has already used the GUI previously), then we run the code on line 75 which sets that ExtraChunk as the one we're going to work with.
Line 78 - This saves the data on our _chunk (which currently contains the text typed into textbox)
Line 80 - This shows a popup message on the GUI with the title of "Saved" and the body of "Your text has been saved."
Building the Project
At this point, we should have a functioning GUI so let's export it and add it to Bakin.
To start, click "Build" in the top menu and then select "Build Solution".

This will build the project files in the output directory you set previously.
Go to the output directory and find the "DemoWindowsFormsPlugin.dll" file (the name may be different depending on what you named your project).

Copy the .dll file and paste it in Bakin's plugin directory - steamapps/common/BAKIN/plugins
Use the GUI!
Open a project in Bakin and select "Functions". Then hover your mouse over "Expanded features" and you should see the GUI for the plugin you created. Select it to open it.
Creating a Plugin Script
Now that we have a simple GUI which stores some text, we'll create a very simple script which will log that text to the debug window of Bakin's test player.
Create a New Script
Create a new common event in your project.
In the common event, select the C# Program Assignment drop-down menu and press "Create New". Call the plugin script whatever you'd like.

Once created, select the script and press "Edit". This should open the script file in Visual Studio.
Update the script so it looks similar to the below image. I'll explain the important lines of code below the image.

Line 11 - This is the ID of the ExtraChunk we saved from the GUI. The ID must be the same as the ID we set on the GUI project.
Lines 39 - 52 - This is a copy of the Chunk class we created in the GUI project. They must be the exact same as each other.
Line 12 - This is our variable to store an instance of the Chunk class.
Lines 18 - 23 - This gets the ExtraChunk with the _extraChunkId we stored in Bakin's catalog and gets the first Chunk data available. If we successfully get the chunk data, we assign it to our _chunk variable. This means the text from the GUI is now stored inside the _chunk variable.
Lines 30 - 33 - This checks if the script is running inside a common event or if the Bakin-provided mapScene variable doesn't currently exist and if not, sets it.
Line 35 - This creates a log entry in the test player's debug window. The first parameter defines what type of log entry it is, the second defines who is sending the log (this can be anything you want) and finally, the third parameter is the text we saved in the GUI
Now that we have this script setup and applied to a common event, it should run and display whatever text we enter into the GUI.

